I’m so in love with these cakes! I was thinking about Halloween treats and since caramel apples are my number one fave I thought how cute would a caramel apple cake be? Side note: close second is my amazing caramel corn which I can’t make very often because I Eat. It. All…You’ve been warned 😉
Back to these cuties though. Once I had the idea, I literally couldn’t choose between a classic one with sprinkles, and my ultimate favorite Disney treat, an apple pie Mickey apple. Hence two cakes (I can be a bit extreme, ha!). Obviously I had to use applesauce cake, but I forgot to leave out the nuts which was annoying when I was trimming the cakes, so keep that in mind when you’re choosing your flavor.
The procedure is much the same for both designs, with a few differences at the end. In this post we are doing the classic apple with sprinkles, and here are the instructions for the apple pie Mickey apple version.
bake and assemble the layers
The classic apple is a 6” diameter spherical pan, and the Mickey one is 5”. For each, you also need one layer in the same diameter as the sphere (so for the 6” sphere, I bake one 6” layer. This is so you don’t have to put enough batter in the sphere to fill it all the way, which would overbake the edges).


Brush shortening inside, then roll flour around. Gently tip the flour out without tapping so there’s a good layer left, fill halfway with batter, and bake. Once they’ve baked and cooled, turn them out of the pans. Wash and dry the pans, and line them with plastic wrap.
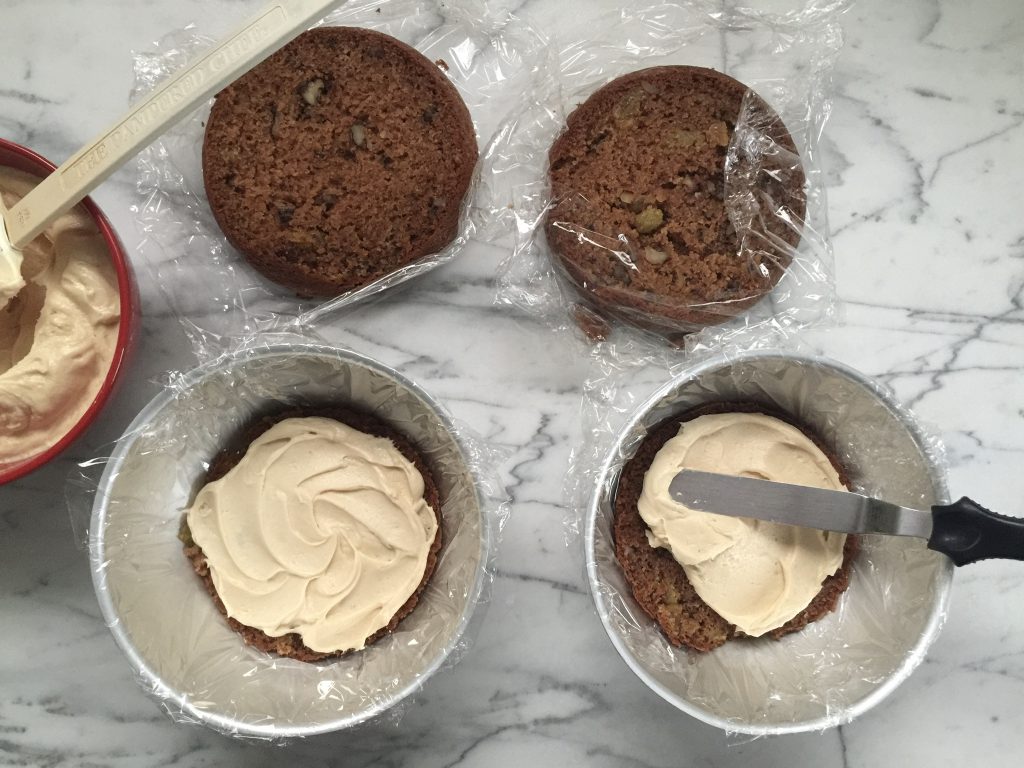
Cut each sphere cross ways in half. Turn the top over and lay it in the bottom of the lined pan and spread a layer of frosting on top (I used my salted caramel buttercream). Put the other half of the sphere on top, and add more frosting. Cut the regular layer into two layers, and put one half on each sphere, to fill each pan to the top.
Chill them thoroughly, at least several hours but overnight is great.
trim and crumbcoat


Tip one cake out and unwrap. To make the bottom of the apple, use a serrated knife in a gentle sawing motion to cut a steeper slope all the way round. Cover in buttercream and stick back in the fridge.


For the top, tip the second cake out and unwrap. Cut a little bit off the top, and with a paring knife pointing in at an angle, cut a divot out. Crumbcoat with buttercream and chill.


For both halves, add a thick layer of buttercream and smooth. The easiest way for curves is with a flexible plastic mat- this one is a strip cut off a larger cutting mat, so it’s easy to handle. For the divot, it’s easiest to chill, then use your fingers to smooth.


Sandwich the halves together with buttercream, and fill in the gap. I started frosting and it wiggled around so I sharpened a 1/4” dowel, stacked several cake boards and hammered the dowel through the center into the boards. That gives you something to hold, along with keeping the cake still while you’re working. Above right you can see the kind of cutting mat that works so well for smoothing buttercream on curves.
Once the cake is perfectly smooth, chill.
decorate!

You’ll need:
- apple green fondant
- caramel brown fondant
- rolling pin
- fondant smoother
- tapered palette knife
- plastic clay knife
- scalpel or x-acto knife
- sugar shaper
- sprinkles (I used this Halloween blend)
first layer of fondant


Roll out your apple green fondant (I got this color by mixing leaf green, yellow and a bit of brown). Run the smoother firmly over it to press out any dents or bubbles.


Lay it carefully over the apple, lowering it straight down over the dowel making sure you’re not pulling outward. Working quickly, gently smooth the fondant over the top to keep the weight of the extra fondant from pulling down. Once it’s secure, use your hands to smooth downwards, pulling the pleats out as shown.


You may hit a point where it’s easier to cut a pleat away, which in this case is completely fine because we’ll be doing a layer of caramel fondant over this one. Just pinch it together and carefully cut with scissors. Rub with the smoother.


The main thing to keep in mind while you’re fiddling with the bottom on a spherical cake is to not allow the fondant to pull down. Continually push the excess inward, and when you cut, push in, not down (the fondant will want to tear). Again no big deal in this case because another layer of fondant, then sprinkles over that will hide a lot!


To polish and work out the last little imperfections, I like to make a little pad out of extra fondant and briskly and gently rub it over the cake in a circular motion. Don’t bother with anything besides the top, keeping in mind the caramel will cover the bottom. Trim the last bit of fondant from around the dowel, and smooth with your fingers and a sugar shaper. If the fondant has gotten a bit sticky while you worked, dip your finger in cornstarch.


Roll out the caramel colored fondant into a strip long enough to go around your apple. Trim one side straight, the other in a wave. Lay the straight edge up against the bottom of the apple.


Wrap the strip around the apple, smoothing as you go. Where it overlaps, use a scalpel to make a cut along where the pieces meet. Smooth the seam.


There will probably be excess at the top; just trim in a wavy line, or however you want the caramel to look. Rub the edges so they are rounded, to look more like real caramel.


For the little puddle of caramel, roll out a rope of fondant and wrap it around the bottom. Rub hard with your finger to flatten it.


Brush piping gel on wherever you’d like the sprinkles to stick (corn syrup will work in a pinch). Press them on with your cupped hand (very messy! Do this on a rimmed tray or baking pan).


Create depth by the stem by brushing brown petal dust on, and make little white dots like Granny Smith apples have with white food coloring.

Now just step back and admire your creation!
Happy baking!!