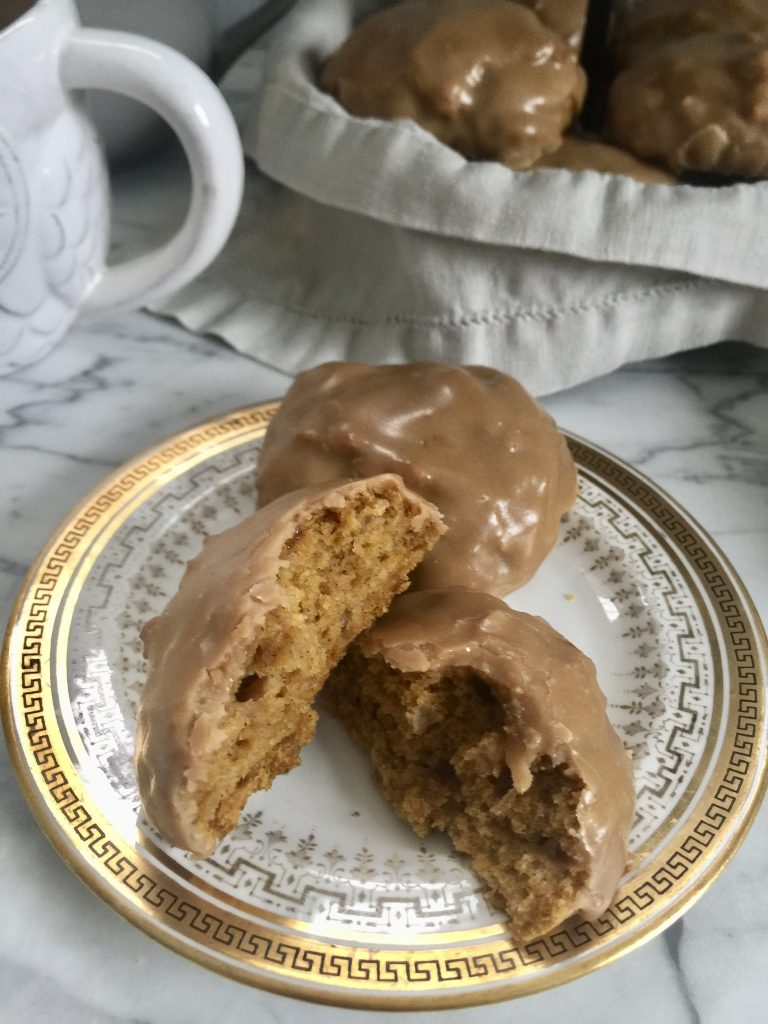
There are a million things I love about fall, and these amazing pumpkin scones are at the top of the list! They are fast and easy to whip up, and this makes a bigger batch than most, which is great for sharing with neighbors :).

The first time I ever went to NYC, I was instructed by a friend in no uncertain terms to try the pumpkin scones at Alice’s Tea Cup since they are seasonal and I’d catch the right time. Well, they are famous for good reason! If I’m there in October, I stop in for one without fail. So of course I needed to be able to replicate them at home. For whatever reason, the recipe they published didn’t work for me as written, but I tweaked it a bit and have been happily making these for years. They are *awesome*.
a few notes
Don’t skip the glaze…the dough only has a little bit of sugar in it, so the sweetness of the glaze works beautifully with it.
One of the kitchen tasks I hate is cutting butter into dough, so I tried something a bit weird once and it worked great. I use my mixer to add the butter to the dry ingredients, then add the liquids by hand. Perfect scones, no pastry cutter! If you don’t mind though, by all means cut the butter in by hand!
Another kind of lazy shortcut is these aren’t cut into triangles, they are scooped and dropped. I like the look of the little rounds, you’re handling the dough less which is good for keeping them tender, and it’s just less hassle.
Squeezing the excess moisture out of the pumpkin makes a huge difference in texture, making them much less cakey.
let’s make them!
Shop my favorite tools here.
Using several thicknesses of paper towels, bundle up the purée and gently squeeze the excess moisture out. I find that different brands have different amounts of water, so don’t worry if not as much comes out as you see here.
Cut the butter up into tablespoons, and add to the dry ingredients. Pulse a few times to break the pieces up a bit (so everything doesn’t go flying), and let run until the mix resembles breadcrumbs, with a few pea-sized bits as well.
The rest of the mixing is done by hand. Add the wet ingredients and mix *just* until the dough comes together.
Drop onto baking sheets with a 1-1/2 ounce scoop. They can be ungreased but I use Silpat mats because clean up is easier. I like to flatten them a bit to make more surface area for the glaze, ha! When you try these you’ll get why.
make the glaze
Combine the brown sugar, butter, cream, salt and lemon juice in a saucepan, and heat up, whisking. Whisk in some sifted powdered sugar until smooth.
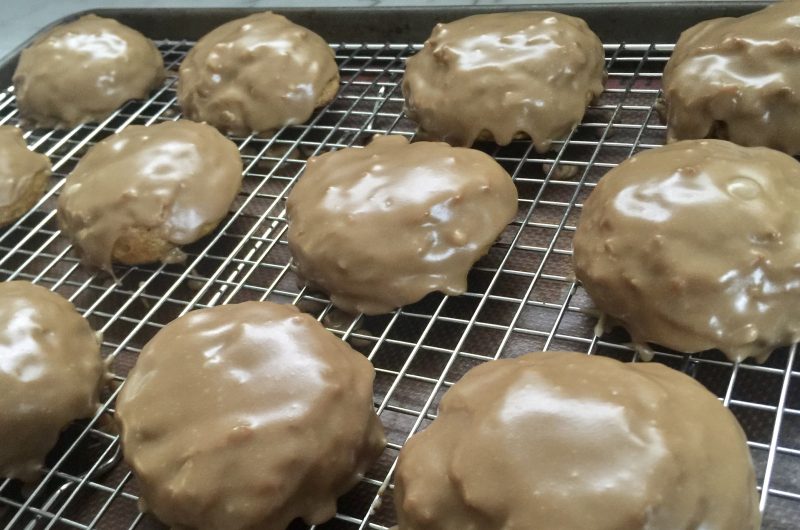
dip them in the glaze
Put a cooling rack over a baking sheet, and dip them in the warm glaze. See how it coats the tip of the tongs? That’s the consistency you’re going for. Let set so the glaze has that slight crust, and dig in!
pumpkin scones
21
servings30
minutes12
minutesTake your afternoon tea to another level with these scrumptious scones!
Ingredients
3 cups all-purpose flour
1/3 cup plus 1 tbsp sugar
1/2 teaspoon baking soda
2-1/2 teaspoons baking powder
3/4 teaspoon salt
4 teaspoons ground ginger
4 teaspoons ground cinnamon
3/4 cup (1-1/2 sticks) unsalted butter, cut into 1-2” pieces
1 cup buttermilk
1/4 cup heavy cream
1 cup canned pumpkin purée, excess moisture squeezed out (see above)
2 tablespoons vanilla
- Caramel glaze
1/2 cup (1 stick) unsalted butter
1 cup brown sugar, firmly packed (I prefer dark but light works as well)
1/2 teaspoon lemon juice
1/4 teaspoon salt
1/4 cup heavy cream
1 cup powdered sugar, sifted, or more as needed
Directions
- Preheat oven to 425 degrees F
- Put all of the dry ingredients (flour, sugar, baking soda, baking powder, salt and spices) in your mixer bowl and mix them up a bit. Add the pieces of butter, and pulse the mixer on and off quickly on low a couple of times, just to make sure flour doesn’t go flying everywhere. When the butter has broken down into small enough bits, let mixer run until the mix resembles breadcrumbs with some pea-sized bits of butter in there as well. Or, use a pastry cutter to blend the butter in.
- Remove the bowl from the mixer and th a rubber spatula, gently add the wet ingredients (buttermilk, cream, purée, and vanilla). Mix until just combined. It’s ok if a bit of flour remains visible.
- With a 1-1/2 ounce scoop, drop portions onto an ungreased baking sheet or silpat. Flatten slightly (I use a spoon). Bake for 12 minutes, and let cool before glazing.
- Glaze
- While they are baking, place the butter, brown sugar, cream, lemon juice and salt in a medium saucepan. Heat up while whisking until smooth. Remove from heat and whisk in powdered sugar. Set aside. When it’s time to glaze, if it’s too thick just heat it up a bit, and if it’s too thin, add a bit more powdered sugar. I like a fairly thick layer of glaze so usually add a bit more.
- To dip the scones, I like to use tongs (I burned my fingers on too-hot glaze once, lol). Just dip them, jiggle the excess back into the pot, and place them on a cooling rack set over a baking sheet, to catch drips. I use a pretty small pot, so the glaze is deep enough, but at the end it’s too shallow. So for the last few, just spoon the glaze over. Yum yum yum.
Notes
- These keep in the fridge or freeze really well, but the glaze gets soft and makes a bit of a mess, so I suggest glazing as needed. Just keep the glaze in the fridge-you can even microwave it (at 20 second intervals until warm). It’s a very quick and easy way to have gorgeous homemade treats around for anyone who might want something snacky 🙂
- One of my readers tried replacing some of the cream in the glaze with a bit of maple syrup, and added vanilla, and said it was fab.
Another lovely thing you can bake today if you’re in the mood for autumn spices is this applesauce cake.
Happy baking!!


