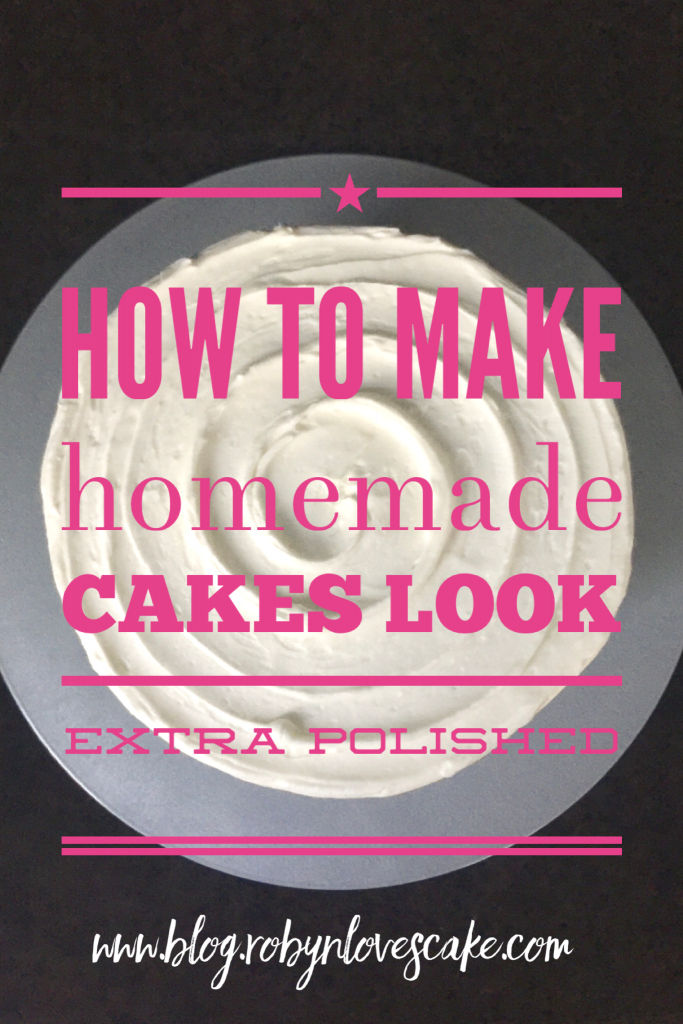
So you’ve baked up a scrumptious cake…now what? I’m sometimes asked for tips on how to make cakes made at home look professional and I’ve got a few thoughts on how to up your presentation without spending tons of extra time. Here’s how to make your cakes look extra polished:
crumb coating
The number one, first place grand prize has to go to: crumb coating. If you haven’t tried it, believe me when I say it’s a game changer. All it means is, after stacking, filling and chilling your cake layers, you do a first coat of frosting…it will have crumbs in it, hence the name.


Then you chill the whole shebang again. This is crucial- the frosting has to be hard to the touch. When it is, you do your second coat. Et voila: magic! The second coat will be gorgeous.
quick and easy buttercream textures
If you’re short on time but want to do something that looks special, try texturing your buttercream with one of these simple techniques:
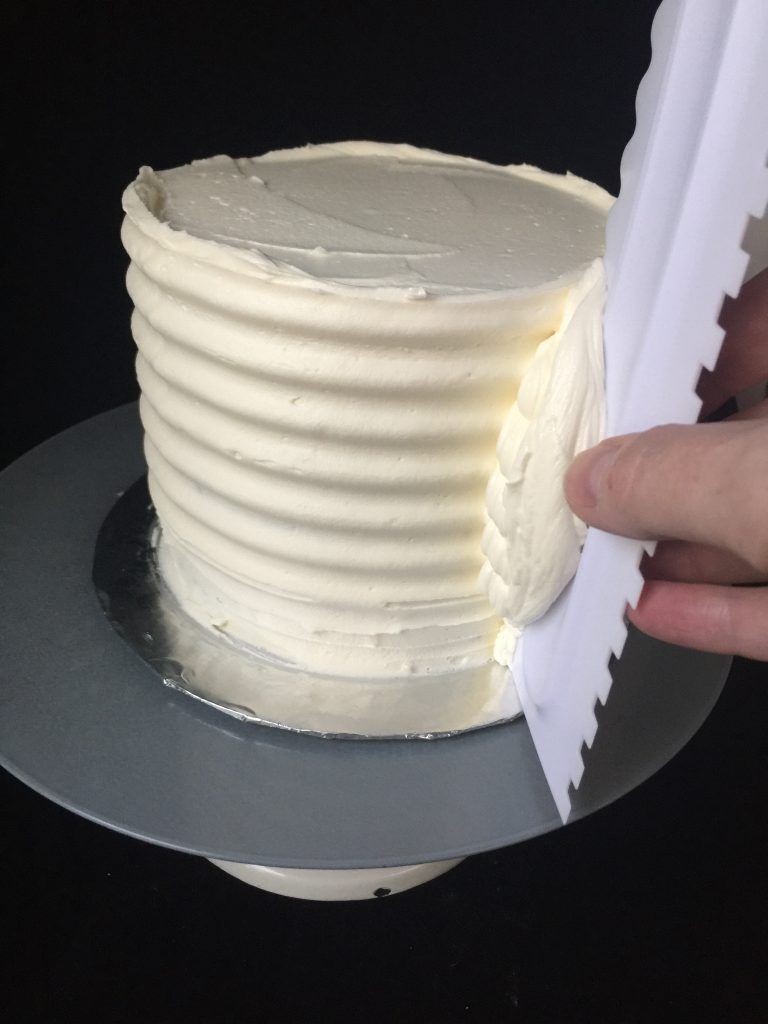
The fastest and simplest must be cake combs. There are a bunch of patterns you can choose from, and once your crumb coat is thoroughly chilled all you do is slather buttercream onto the cake, and hold the comb against the side while you spin the turntable (see best tools to get, below). Fun and so easy!
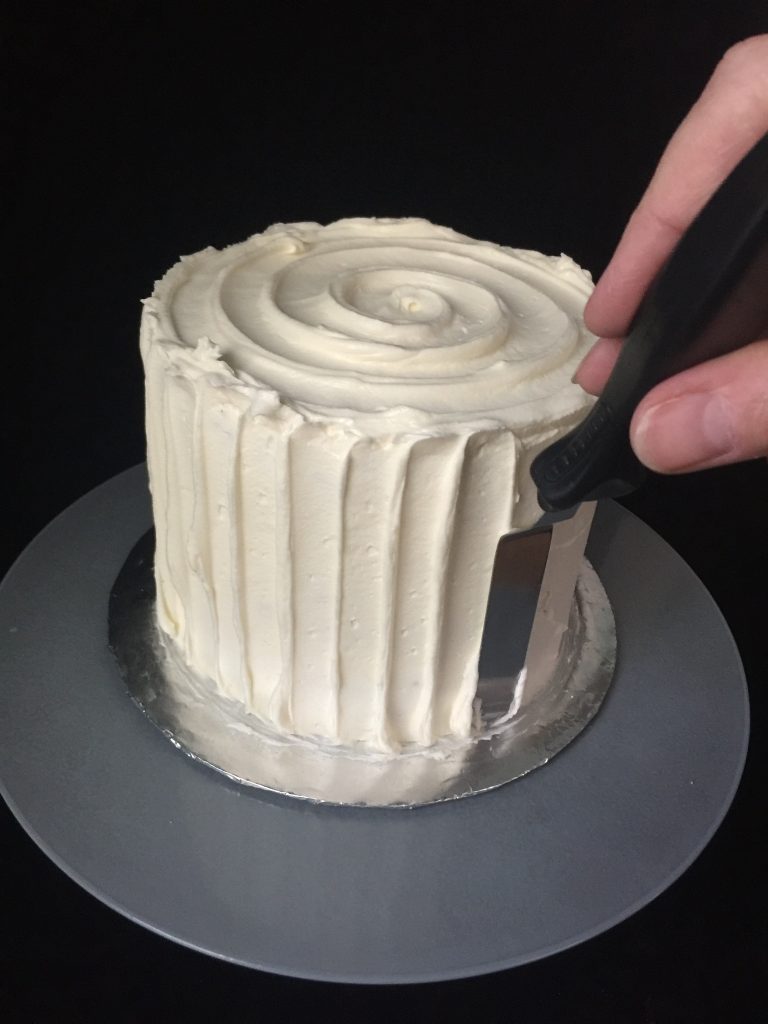

Another of my favorites is these vertical stripes-all you need is a palette knife. Just hold it against the side and move up from the bottom, turning a bit before the next stripe.


For a really rustic effect I love these horizontal stripes. Experiment with what works best for you but for me it’s a spoon. Starting at the bottom, just hold the spoon against the cake while you spin the turntable. At the end of each rotation, wipe the spoon clean and move up a bit for the next row. For the spiral on top, just hold the spoon in place, slowly moving it towards the center while spinning the turntable. It may take a couple of tries to get the effect you want, but one of the pleasures of working with buttercream is you can scrape it off and go again!
ombré buttercream


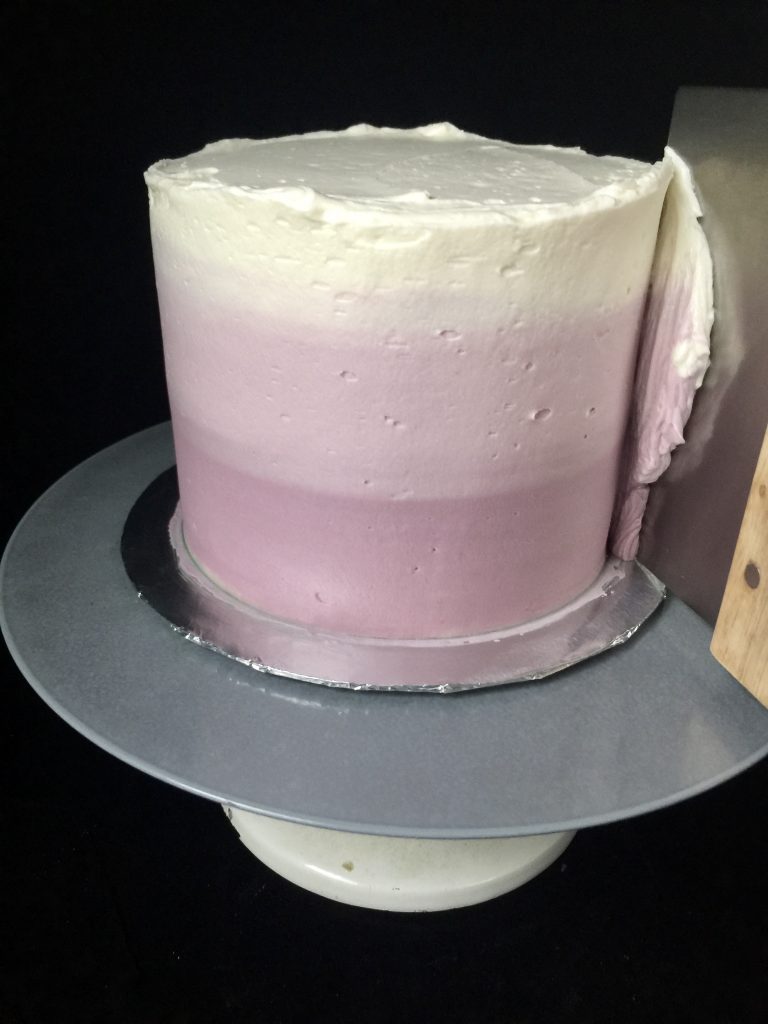

One of my very favorite things to do with buttercream is a simple ombré. To me it looks like it takes way more time than it does which is always great! Just mix up a bit of buttercream in your chosen color (this is a 6” cake, so pretty small, and I only used about 1/2 cup in each hue). Spread that along the bottom, with a small palette knife. Add a scoop of white buttercream to the remainder to lighten it, and add that to the center. At the top, finish with white and smooth with a bench scraper (hold it against the side while rotating the turntable with your other hand. Do it fairly lightly so you don’t take off too much, and scrape it off between passes).
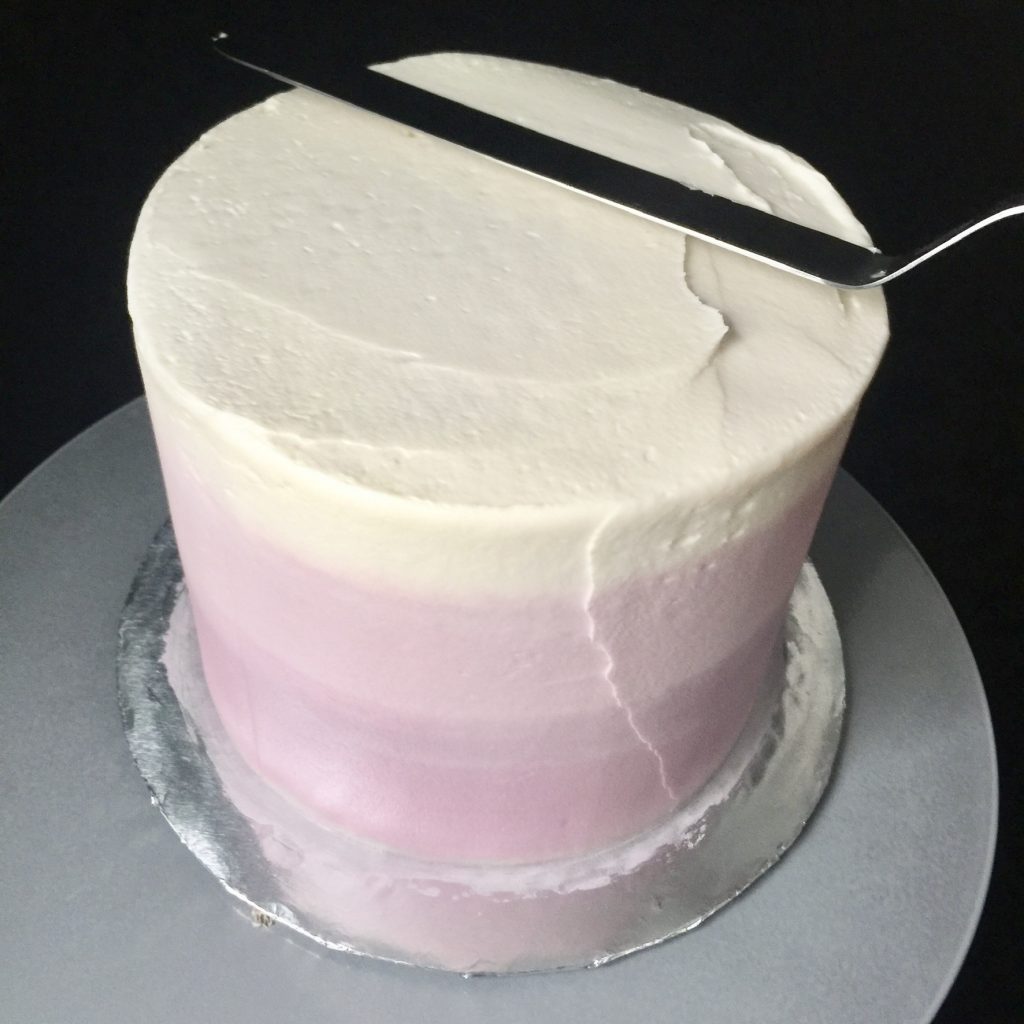
To clean up the top, use a large offset spatula. Very lightly run it from the outside toward the center, cleaning it off between each and every pass. That knocks down the little peaks that build up on the sides. And you’re done! Ready for a cute topper (those pretty glittery paper ones would be perfect) and maybe some fun sprinkles. Get ready for kudos!
If you are frosting your cake on the plate you are serving it on, you can cut strips of parchment or wax paper and stick them a bit under the cake to protect the plate while you’re working…then slide them out when you’re done.
invaluable cake decorating tools
There are a few fairly inexpensive tools I can’t live without, and would highly recommended if you enjoy frosting cakes…they will make it sooo much more fun:
- the top two are a tie in terms of importance: a turntable and offset spatulas. You’ll wonder how you lived without them! The above link is for an Ateco (the Cadillac of turntables) but this one looks great too and has good reviews. For the spatulas, I have lots of brands but like my Wilton ones the best.
- a bench scraper. It has lots of uses but the main one for cake is getting straight sides (you need the aforementioned turntable for this)
- honestly those are the only non-negotiables, but from here the sky’s the limit as far as fun decorating tools and gadgets go…next on the list should probably be piping bags and tips, and fun colors.
If you try any of these I’d love to see!
Happy baking!!

I had no idea the top could look so great with just a swirl of a spoon. Definitely need to try that next time
If you’ve cut parchment rounds for your cake pans, keep the scraps to put under the cake while you frost. It’s already the right size and shape for the edge of your cake.
(Made the chocolate cake this week. It is amazing! Robyn, you’re the best!)
That’s an awesome tip!! So glad you liked the cake thank you so much Caroline!!