I do love modeling chocolate with no shame! I was leery of it for a while, and granted it doesn’t work for everything (more on that below), but for the things it’s good for, it’s *really* good.
pros
First on the list is how quickly it sets up, which mostly factors in when you’re doing figurines. With gumpaste and fondant you have to wait overnight for the body to dry enough for the next step but not with good old MC. Just stick it in the fridge for a few minutes. Second (and this will sound contradictory but stay with me) is the extended “playtime” you get. The magic is, you can sculpt a face you’re not happy with, but you’re not sure what’s wrong. Next day with fresh eyes you see the angle that’s bothering you and You Can Shave Off the Weird Bit. Just rub the edges a bit with a shaper or your fingertip, and there’s no sign left. You could neeeever do that with gumpaste or fondant.
And when you’re doing something like this Pikachu, once the body is firm you can add arms and blend the seams perfectly. Same idea with my cupcake topper floaties. That’s why MC is my true love.
cons
So what’s the catch? Well, my friend MC is a bit…persnickety. If your hands and/or your room are hot, you’ll need to be careful. Basically you need to learn the signs of when he needs a little break in the fridge: getting too soft (which is preceded by getting shinier). On hot days you can keep a bowl of ice water nearby, and dip your fingers in it (then dry them well) to keep them cool.
Also, it’s not strong or elastic. For those applications (like flowers), you’ll want gumpaste. It can be a learning curve, figuring out which material is best for each project. Feel free to ask in the comments if you have a dilemma and I’ll do my best to help.
so how do you make this stuff?
This is another case where I tried a million times to get something down and it went wrong a million times…I had so much trouble with the standard recipe (just candy melts and corn syrup). Thankfully I tried a recipe by Nadia at Chokolate, which incorporated powdered sugar, and that made a big difference. I’ve tinkered with the proportions a bit and this is what works great for me. That said, you must be careful not to overstir…I’ve done a very quick video below that shows exactly how much to incorporate the ingredients. It’s an extremely quick and simple process though!


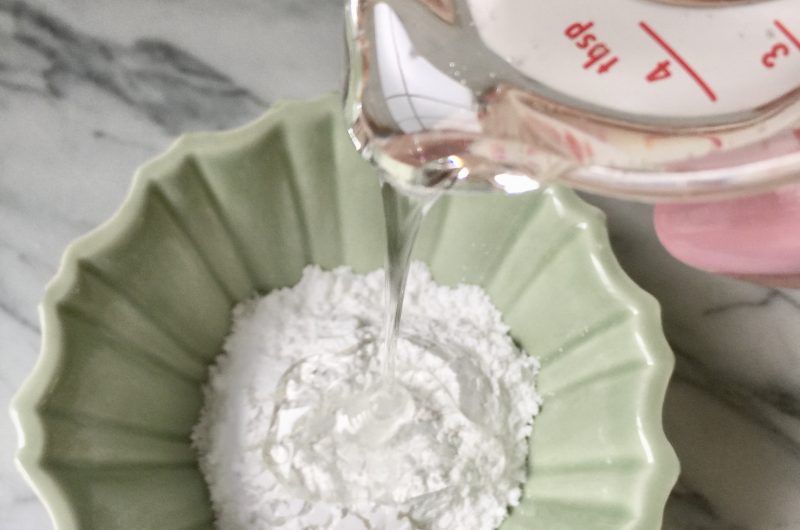
Combine the corn syrup and powdered sugar (I use a small whisk).

Melt the bag of candy melts in the microwave (they are pretty tough, not delicate like real chocolate). Start with 30 second increments until you figure out the right time for your microwave.
Add the corn syrup mixture to the melted chocolate, and fold them together. You’ll see in the short video above how quickly it turns into a paste; as soon as things are blended, stop mixing,


Wrap up in plastic wrap and let sit several hours or overnight. It will be really hard so cut off small pieces and knead them to soften.
Now you can start having fun!
modeling chocolate
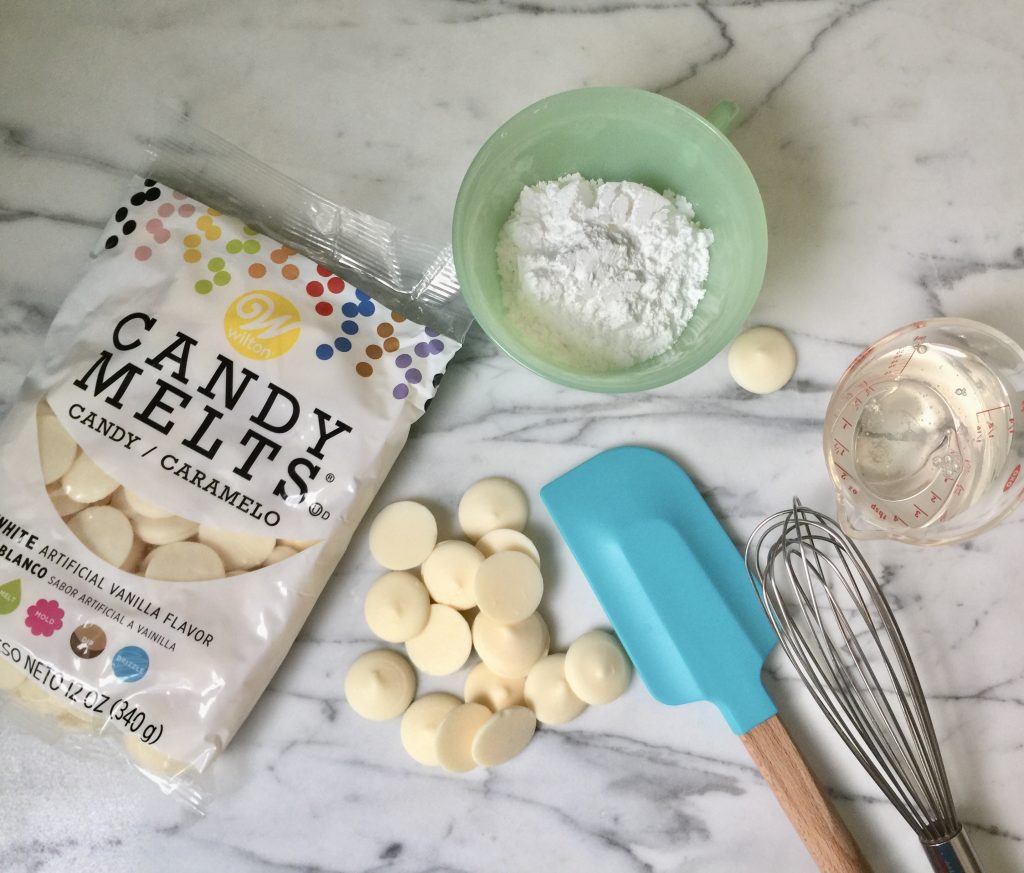
Course: Cake Decorating MaterialsCuisine: InternationalDifficulty: EasyIngredients
1 bag candy melts (340 grams)
(I find that “bright white” has a chalky texture, so I stick to regular white, or a color)42 grams powdered sugar
85 grams corn syrup or glucose
Directions
- Combine corn syrup and powdered sugar until smooth
- Melt candy melts in the microwave in 30 second intervals
- Combine carefully so it is not overworked, because it may split (watch the quick video above for reference)
- Wrap in plastic wrap and leave to set several hours or overnight
Notes
- In scaling the recipe to work with one bag of melts, I had to stick with grams (converting to ounces results in fiddly tablespoon measurements). Weighing yields better results in tons of baking recipes, and scales aren’t too expensive. If you bake, you’ll get tons of use from one!
- To be filed under Never Stop Learning: I just saw a tip from Liz Marek saying she kneads the mix when it’s about half set up, rather than letting it get completely hard first. Very worth doing! It gets rid of any possible lumps, and I’m finding the modeling chocolate is more workable even after it is all the way set up.


Ok…this is my first time ever even attempting this and I only discovered it the other day because I was looking at simply carving into chocolate but came upon modeling chocolate and figured that might be slightly easier. Apparently not as easy as I was thinking and mine is slightly messed up I think. Like it feels extremely oily when I try to work with it and it isn’t holding as well as I need it to (I’m making the Batmobile from just looking at one). Would it be ok to just kneed in some powdered sugar or would that just completely mess it up? I fix my fondant by doing it that way but I know this is a different substance all together and don’t want to accidently ruin it.
It can be finicky but once you get the hang of it it’s the best for sculpting! Don’t knead it any more! Let it sit until it hardens back up, then you can knead the oil back in. You’ll get a feel for when it’s been over handled- just let it sit until it’s firm again. In a cool room it doesn’t take long, or you can use the fridge for short periods of time. Good luck!